Wednesday, March 16, 2016

So Moving along with the C-Frame Table. I have put on the table top.


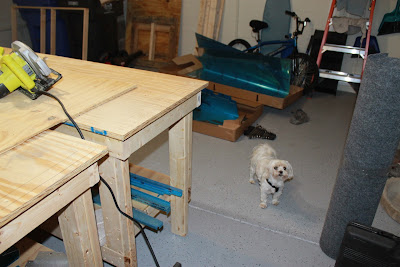
And I have given it Feet for leveling.


And BAM!!! Carpet to finish it off. 


And for those of you who ask - WHY???  Here is a pic of it in use. When I need to get to the center of a Skin section, this will allow a perfect smack in the right spot where no other tool can reach, and can be done by one person.  Gotta be smart folks.


Hobson wants to know what all the damn racket is. He said he wants a turn on the circular saw.


Today I am working on building a table for my C-Frame. C-Frame is a tool used to dimple skins way out in the middle where you can reach with no other tool.


Some people use the C-Frame naked and attempt to navigate to the hole in mid error. This method would definitely be a two or three man job. As I am by myself, I will make a table to slide the skin around and hold it while I smack the C-Frame with the hammer.


First I needed to arrange my work tables into a square and re-level.


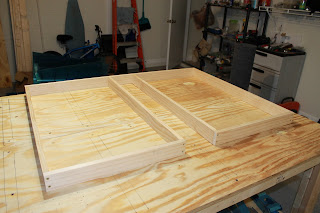
To build the table, Cleveland tools has provided some plans.

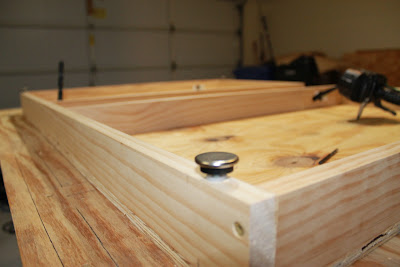
So here is the frame put together with screws and wood glue.


Monday, March 14, 2016

Start Vertical Stabilizer

I seem to be at a standstill waiting for priming to finish the Horizontal Stabilizer so tonight I decided to begin work on the Vertical Stabilizer. I have gotten as far as to assemble the under structure and have clecoed the skin on. Next step is to final drill all holes in the skin. As Bentley is letting me know it is time for bed (ruff. . . ruff. . . ruff), I guess it's time to quit for the night.


Saturday, March 12, 2016

Another long night of edge and hole deburring. Spent 7 hours sanding and grinding. I think I have now removed all scratches and rough edges. Next step is to dimple and then prime.


Thursday, March 10, 2016

Right Side Horizontal Stabilizer

And POOF!!! Now there are two. the second one took only about half the time. Getting faster with practice. I think my next airplane project will be completed in a weekend.


All ribs for the left side now drilled and in place. All surface holes to attach the skin predrilled and clecoed in place. Now on to the right side.


Wednesday, March 9, 2016

Deburring Complete - now the Skin!!!

Well this is a motivating step. After deburring all pieces, it is time to assemble the left side and test fit the skin. This is  why it is difficult to screw up this kit. If the holes in the skin line up - you know you are in the right spot.

I must be doing something right - perfect fit!!


Tuesday, March 8, 2016

I hate deburring!

Wow, I don't mind so much deburing holes, but I hate deburring around relief cuts and edges in the ribs. I Hate Ribs. Spent 5 hours sanding and filing. I have 8 of 10 done today. 2 more for tomorrow.

The blue ones I have left to finish up. 


Answer returned from Vans tech support

the response from VANs' tech support


I Don’t see a problem with the part you have modified. As long as this does not create a problem with sort edge distance on a rivet hole you can move on with this part.

Sterling

Guess I am good to go with the part.

I have now learned to leave the Scotch Bright Wheel alone and just use the file and Scotch Bright pads to fine tune the ribs. They are now turning out just like to pictures in the plans.

Saturday, March 5, 2016

Test Front and Rear Spar assembly with ribs

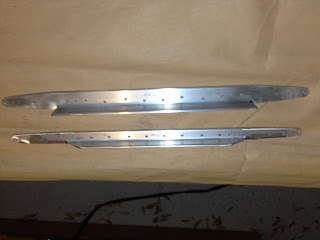
Working through the day, I have prepped  each rib by fluting and deburring. Here is the test assembly. Starting to take the shape of something recognizable.


After test assembly, I have taken the pieces apart again for final finishing before they are ready to prime. As part of the finishing, I am required to shape each piece where the skin will encounter a gap. This is necessary to avoid a corner or edge in the support rib from pushing up on the skin causing and undesirable ridge. To speed things along, i have been using a scotch bright wheel (like a grinding wheel but much softer). Unfortunately I must have been a little over zealous and have have taken off to much material. I have sent an email to technical support to ask if it is necessary to replace the part or if I am fine. I placed it next to a good part for comparison. I am going to guess that it is fine. There is still plenty of material for the skin / leading edge to sit against to form the proper shape; however, Van's technical support will have the final say. Probably many more ruined parts to come.


Calling it quits for tonight before I ruin anything else.

today was my first crack at dimpling and counter sinking.

First I set up the tool.


then make the cut on the actual parts.


Calling it a night. Here is progress for this session. I have completed the drilling and assembly of the front spar for the horizontal stabilizer. Now it is just about ready to prime.


you might see that I didn't quite get the top reinforcement angle bracket right. It is just peaking above the spar itself. This will interfere with the skin when it goes on. I will need to file this down just a bit.

Friday, March 4, 2016

This piece requires an angle of 6 degrees. Using a cardboard template to get the angle right.


one part at a time folks. Used a hand file to shape these four ends. My band saw is still in New York. About 4 hours of filing.


I have also been building over the last few days as well.

Rear Spar complete - ready to be primed


Front spar now underway


I have not posted in a few days as I have been concentrating more on building than posting. My parts for the shop computer have arrived today so now it will be easier to post as I work.

For those of you that don't have a clue what I am building, I will post some pics and information about the finished product.

This will be a 2 seat Experimental Aircraft with about a 1,000 mile range. I am told that construction time will generally be around 2,000 hours. Many people complete the project in around 2 year. Many people also never finish.


This photo is of a factory plane I believe was constructed by VAN's Aircraft as a demo.

For more information here is a link to the kit manufacturer.

https://www.vansaircraft.com/public/rv7.htm