Here is something new I learned today. When cutting aluminum tubing, it is difficult to get a perfectly square edge. The method in the Plans worked out great.
First make a mark where the length should be. You can see the dot here.
Chuck the tube up in the drill press and spin a line around the tube with the sharpie.
Make a rough cut with a hack saw leaving some extra space as the cut will never be perfect.
Put the tube back into the drill press and spin it on some sand paper until down exactly to the line.
And there are two perfect spacers 1 and 28/64 (or 1 and 7/16)
Tuesday, January 31, 2017
Monday, January 30, 2017
Sunday, January 29, 2017
F704 - Main Spar
F705 Bulkhead
Assemble F706 Bulkhead
Priming - Using the HVLP system
The priming up until this point, I have been using Duplicolor Self Etching Primer in a standard rattle can. This is the stuff that is available right around the corner for $5 per can. I find it funny that many people swear by this stuff including the editor of Kit Plane magazine. After using this on the interior components of the tail section, I have concluded that IT SUCKS!!! It seems to scratch off way to easy. The issue is that I need to rivet the pieces together after priming. This absolutely destroys the coat. It probably is not designed quite right for this application or something. So I have asked around and the other builders locally are using a product designed by Dupont. It is called Variprime Self etching primer. Surprise suprise it come in at around $400 per gallon!!!
This is applied with the new fanged HVLP gun that I picked up from harbor freight complete with a regulator for $30.
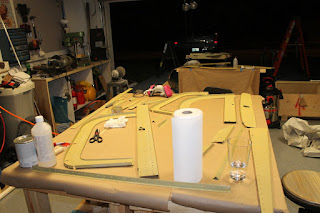
Check out my first attempt. These are the majority of the bulkhead components that I will be assembling of the next few days. (Oh, and another lesson. Don't paint at night.)
This is a two part self etching primer that is fast drying and provides excellent corrosion resistance and direct-to-metal adhesion. Blah blah blah. Anyway after trying it out, it is wonderful. And it should be for price!!!
This is applied with the new fanged HVLP gun that I picked up from harbor freight complete with a regulator for $30.
Check out my first attempt. These are the majority of the bulkhead components that I will be assembling of the next few days. (Oh, and another lesson. Don't paint at night.)
F706 Bulkhead
OK, OK, so I am getting lazy. Not with building. I am getting lazy with my documentation. I get moving along with cranking out parts, I hate to stop to write in the log book and post my progress here. Don't worry though. I have been snapping pictures along the way.
So, the next bulkhead is the F706. This is located behind the baggage compartment and is the main support for the elevator push rod bell-crank. There is some fabrication here as well. The angle aluminum needs to be cut out and shaped.
Then all the pieces are put together, match drilled and fitted.
Good times.
Sunday, January 15, 2017
F705 Bulkhead
The 705 bulkhead sits around the rear of the seating area. This also is the attach point for the seat belts and the seat adjustment points.
First make some small spacers.
Clamp a couple of bars in place and position the spacer. This will be the rear attach point for the wings as well.
Then drill all the rivet and bolt holes
These are the seat belt attachment brackets. I got smart and made a rough jig in the drill press to make sure all the holes are in the same location. This made the job very quick as I only needed to measure one of them.
Next to shape the bar doublers. Again used a hack saw for the rough shape and finished up with the files and wheel.
Fabricating the Control Stick Attachment Points
This piece is the attach point for the control stick assemble. This guy is a pain in the but as there is a "complex" shape that needs to be cut out of the raw material.
Used a hack saw to rough out the shape and the files to clean it up. Then a spin on the scotch brite wheel to shine it up.
Here is a before an after shot of the piece. And yes, I need to do the other one too.
Used a hack saw to rough out the shape and the files to clean it up. Then a spin on the scotch brite wheel to shine it up.
Here is a before an after shot of the piece. And yes, I need to do the other one too.
Thursday, January 12, 2017
F704 Main Bulkhead
Tonight I'm working on the F704 Main Bulkhead. This is the main section under the seats where the wing will attach to the plane. Starting with the brackets which will attach the floor panels, these must be match drilled to the main section.
After this, a rear stiffener must be fabricated from raw angle aluminium. This will attach from the back side on the brackets.
Each of these requires several nutplates attached which will allow the use of screws from the top side the the floor boards are installed.
After about 4 hours of work, here is what I have ended up with.
I have to make a run to Harbor Freight to buy an HVLP sprayer and order some primer. Until then, these parts will go into the "almost finished" pile.
Tomorrow, on the the control sticks.
Monday, January 9, 2017
Rivet the Firewall
Saturday, January 7, 2017
Attach Elevator Trim Tab
Sunday, January 1, 2017
Firewall Assy
Subscribe to:
Posts (Atom)